
Industry Brief Blog - Total War: Three Kingdoms
- allinsonjoseph
- Oct 17, 2021
- 14 min read
Updated: Feb 11, 2024
Week 11 -
I have been back on the work grind this week.
I have gone through all my blog posts and corrected things, changed grammar, added pictures etc.
This was mostly to improve the look of the blog and make sure it is up to date. However it also helped me to see what I have actually done for this project and what amount of work I have done each week.
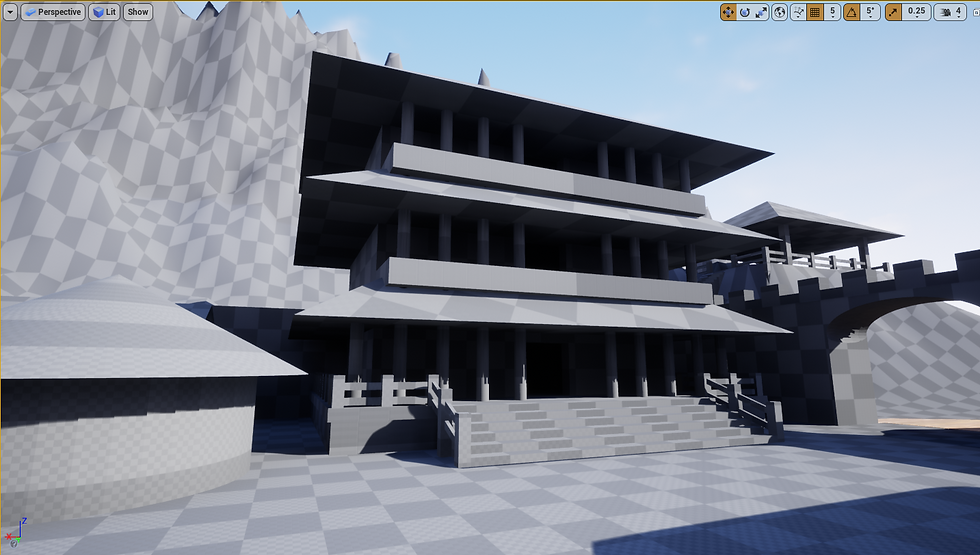
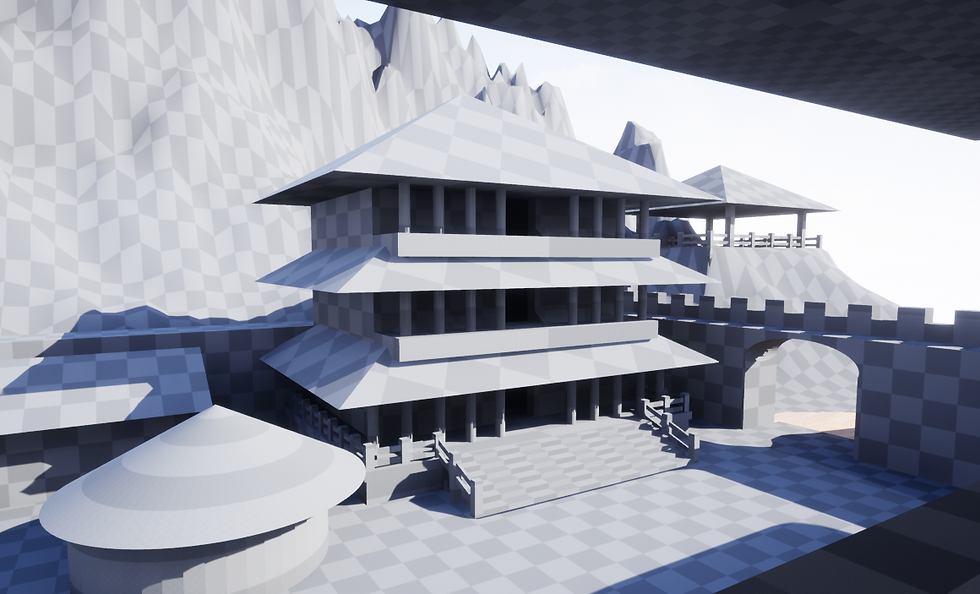
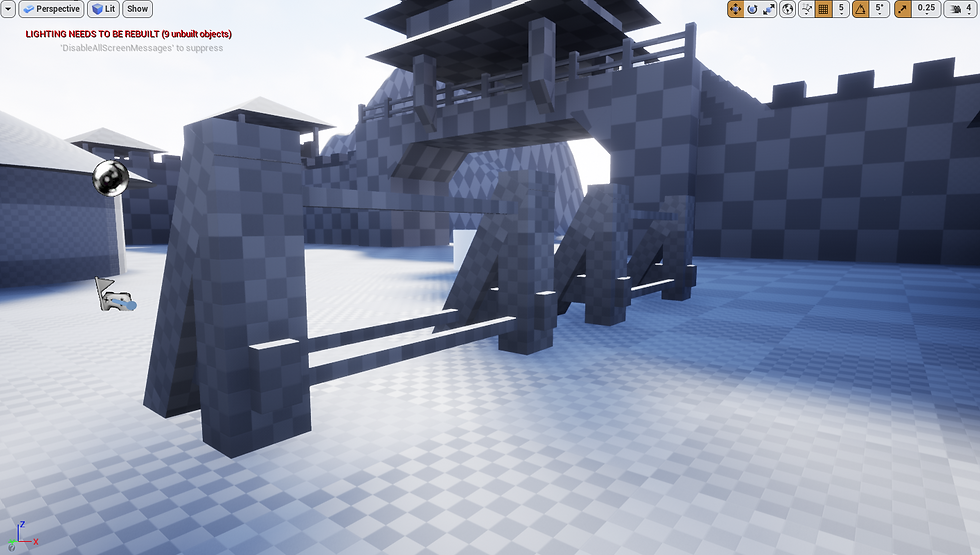
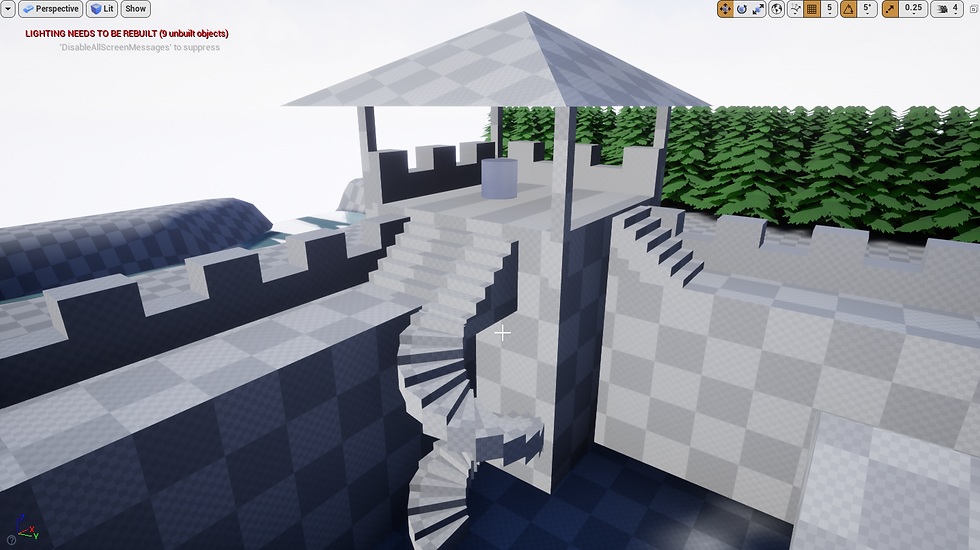
Also this week, I finished adding buildings etc to the inside of the fort.
What I wanted in the rest of the fort was a main building for the higher ups in command. This would be the tallest and biggest building.
I also wanted To add a small stable at the back of the fort. This would be for the generals because in game some generals ride horses. It would also possibly allow the generals to escape the fort if needed or it could be used to send for reinforcements.
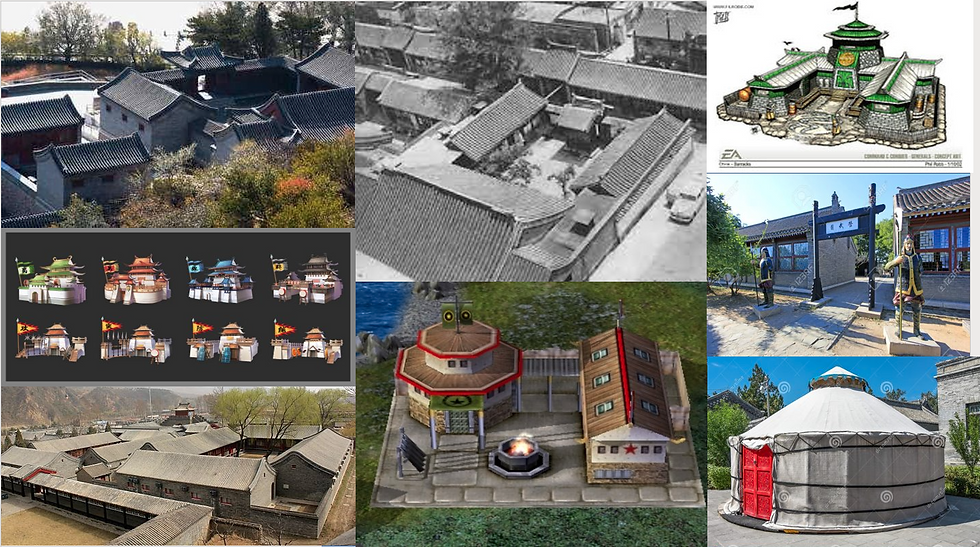
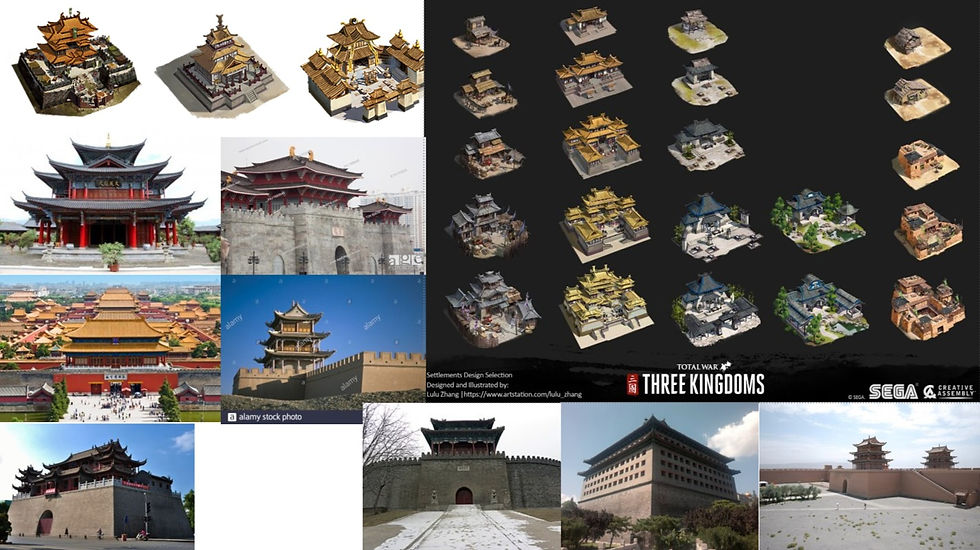
I made a joint mood board to see what common designs were, what designs would fit the style, and what designs would actually fit inside my level.
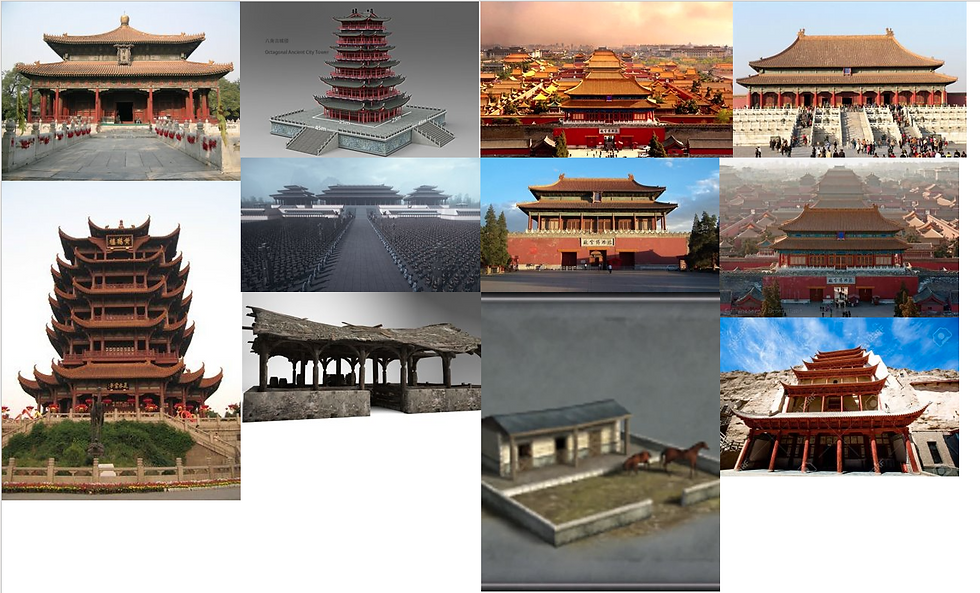
These are the buildings I added to the level based off the mood boards I created. I noticed the use of edged corners and pillars are very common so I used this in a lot of the designs.

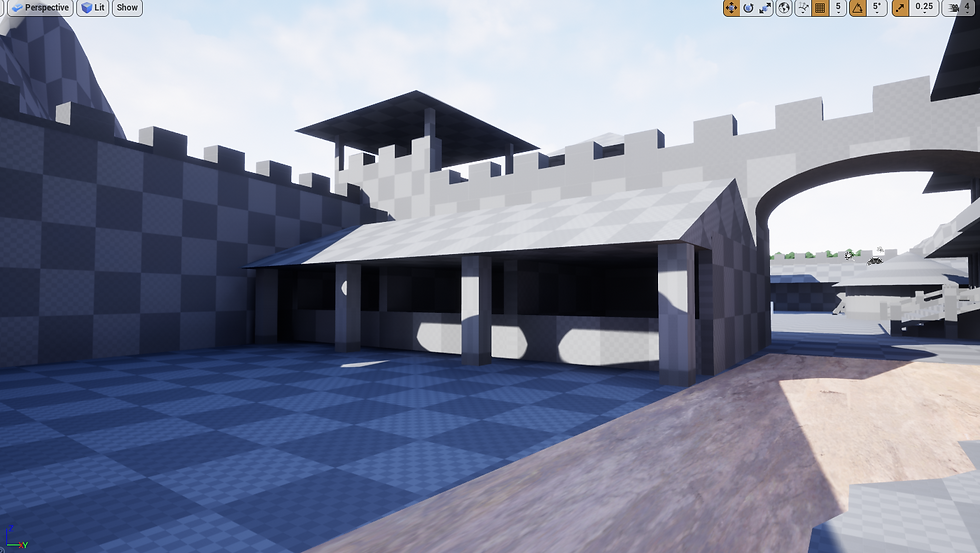
I am very happy with how these turned out.
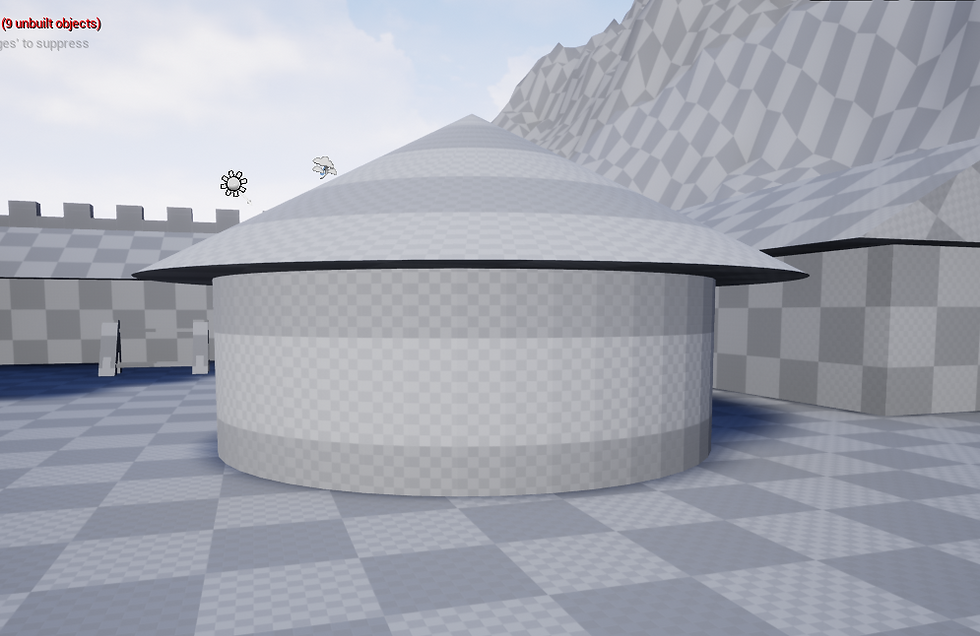
I also did some primary research. I asked some people about what they though the design of the stable was without any context. Everyone said that they though it was a stable, with some saying they also though it could be a blacksmiths.
This really helped with knowing what players would think this structure is. Level design is showing the player without telling them, and with this it has shown me that I can actually do it.
Next week Is the last week in classes, so after this week I won't be getting direct feedback. So next week I want to get feedback on my project so far. I still have a while until the hand in date, however I would like to finish this week and get all the feedback I can. I will work on all the feedback and improvements and then start work on my video/narration the week after.
__________________________________________________________________________________
Week 10 -
This week I haven't done any work on my project.
Because the hand in date for a separate module is much earlier than this module, I have been focusing on that one and not this.
I feel like I am pretty up to date and possibly even ahead of schedule for this project, so this isn't a huge impact. However I do need to get back to working on this project next week. I also need to work on this blog, I need to add more pictures and tweak a few posts.
Saying all this though I do feel like the work I have done so far is good and I am actually still learning a lot as I progress.
So next weeks aims are to sort my blog posts out and get them all up to date, and to get back to working on my project. I want to start adding the rest of the buildings in the fort. I need to create mood boards and then a design layout. Once that is done I can start to implement them into the level.
__________________________________________________________________________________
Week 9 -
This week I haven't had any issues or problems with work saving etc. so I have been able to get on and make some progress. But I have been focusing on other modules on my course so I haven't done as much work on this as I would like.
This week I have been working on the inside of the fort. I have done a layout design for the inside of the fort. This really helped with me knowing what and where I actually want to have in the fort.
I have also done mood boards for the different buildings I want inside the fort. These give me a good reference on sizes and shapes as well as what I will actually fit (style wise) inside the fort.
From mood boards I noticed that the styles and designs were all very similar and simple. Also from watching gameplay videos I noticed this was the same in game too.
This means the design is fairly simple to achieve and keep consistent.
I did a lot of research about it and spent a while designing it during the week so I still have some work to do on it in unreal.
However I have done a fairly decent amount of progress.
I have added the main barrack buildings and sorted the dimensions/sizes of them.
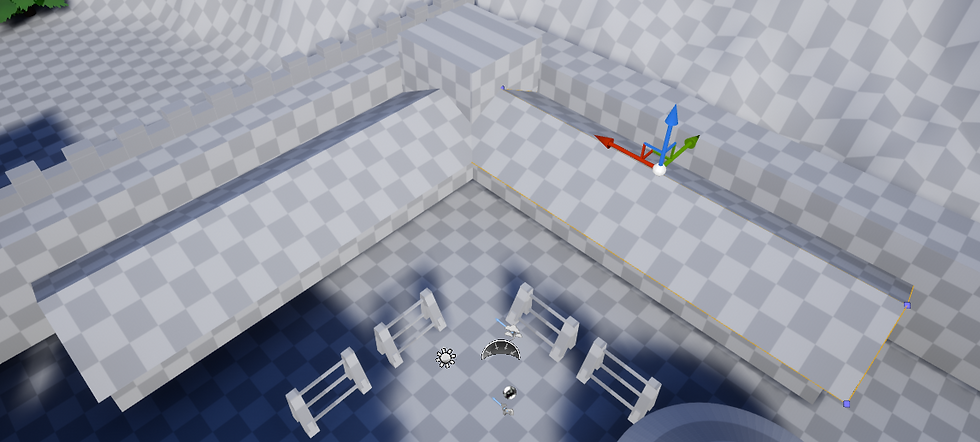
I have added the weapon racks.
I have added the generals tent.
I am overall pretty happy with my progress so far, but I still need to work on and finish the whole of the inside. Next week I will focus on finishing the inside of the fort fully, even if it's just the first draft. I want to also possibly add a wall/mound to cover the back entrance to the fort to stop the attackers seeing it. I also want to add a mountain side onto the other side of the river. This will keep to my proposal of it being a choke.
__________________________________________________________________________________
Week 8 -
This week I wanted to start on the inside of the fort with buildings etc. however I had some issues with my files not letting me load my project from my most recent save. This meant I had to redo last weeks work. So unfortunately I lost a weeks worth of time for this project, but I did make up for it by adding onto what I'd done last week.
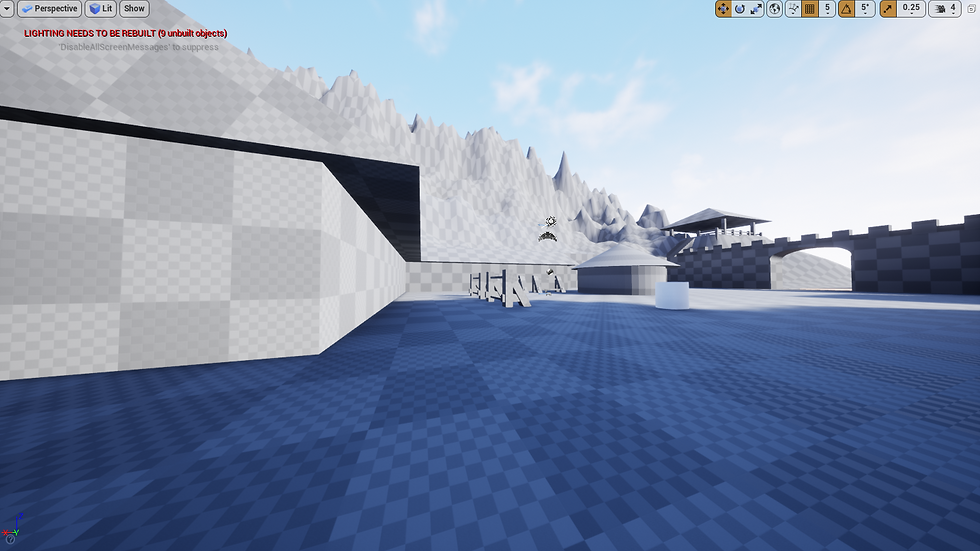
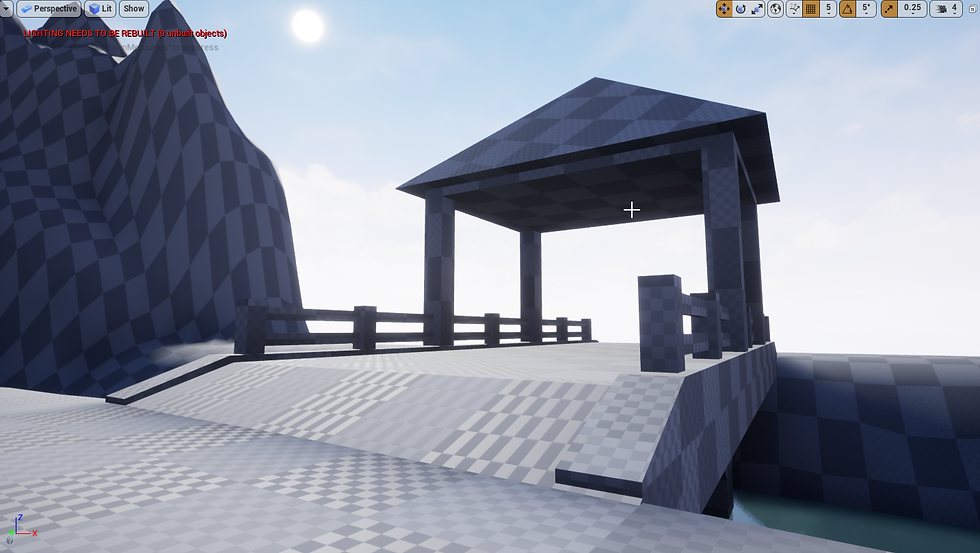
I added the hidden entrance for reinforcements/escaping from the fort as well as a watchtower on the cliff.
I am annoyed about having to redo my work but I think it turned out better on this redo because I had a better idea of what I wanted the level to be/look like.
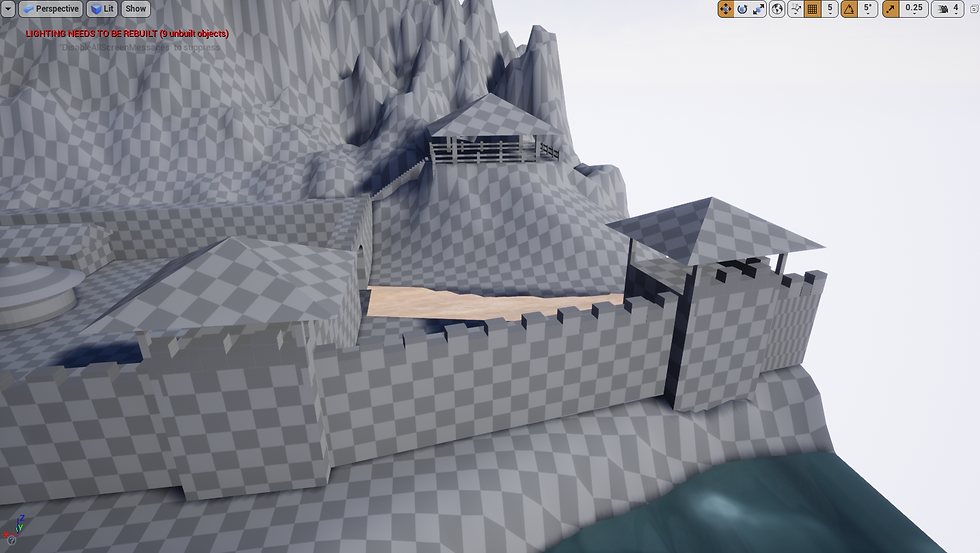

This is from the directional view of the attacker. They are unable to se the secret gateway at the back of the fort. They will be deceived into thinking it is just one big fort area.
The mountains on either side of the fort along with the river makes it so that the only way through the choke point is through the fort.

The mountains on either side of the fort along with the river makes it so that the only way through the choke point is through the fort.
This is from the directional view of the attacker. They are unable to see the secret gateway at the back of the fort. This means the defenders have the option to get reinforcements or are able to escape and save some troops.
I also want the player attacking to know they can only come from one side. This is why I made it a choke point with mountains on each side of the fort. This shows the attacking and defending players the direction of attack.
In turn this gives the player more strategic input to make plays.
My goal is to keep both attackers and defenders advantages/disadvantages equal, so that the winner is the player uses skill.
Next weeks aims are going to be the same as last weeks aims because of the issues I've had. So rather than trying to do anything else I'm going to just go back and do what I said I was going to do this week but for next week instead, these being to focus on the inside of the fort.
I want to see what building designs would fit into it and see if I need to change the design on my design layout. I hope to at least start on adding buildings, however as long as I know what I need and where to put buildings I will be happy.
This means doing research on the design of things such as barracks and the generals buildings/any trading buildings. I will make a mood board to help me with this.
Next week I will have created mood boards and will start to try different placements of each building around the fort.
__________________________________________________________________________________
Week 7 -
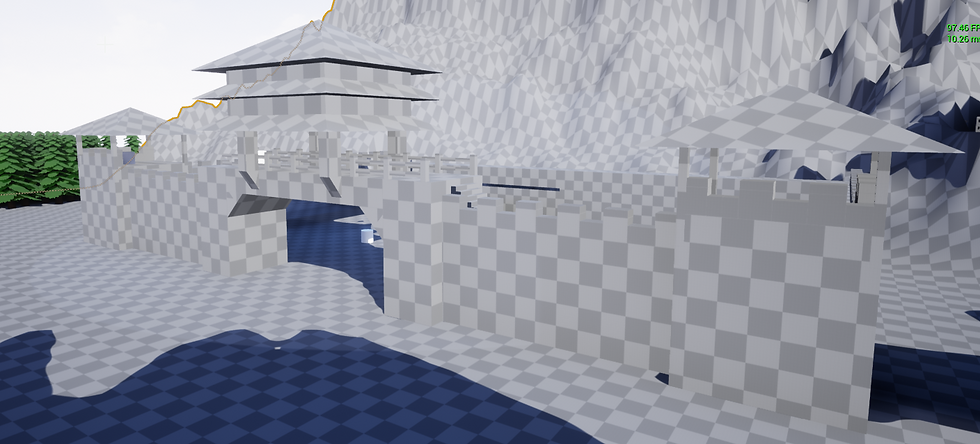
This week I have managed to finish all the big main parts of the blockout.
I finished off the main fort structure with the walls and towers/gateway. This means I can focus on the buildings etc inside the fort.
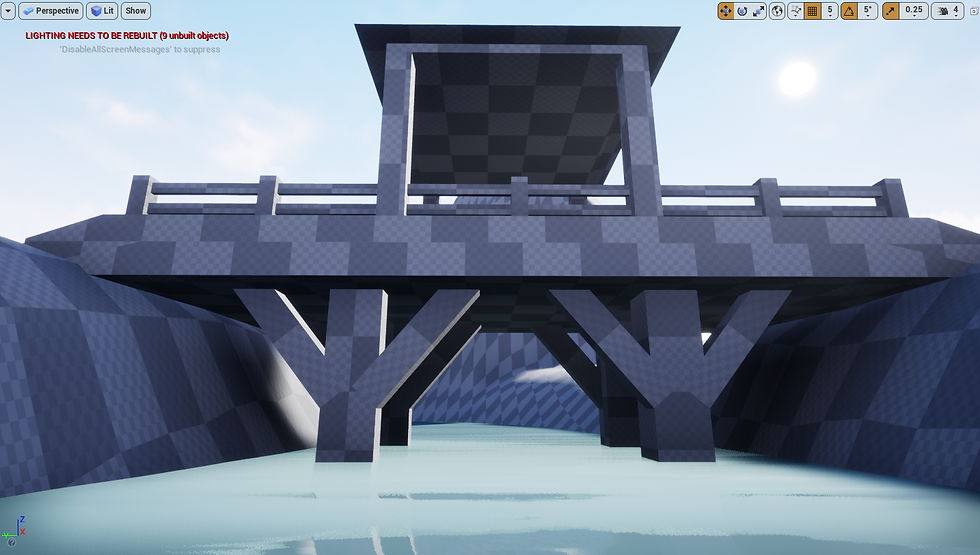
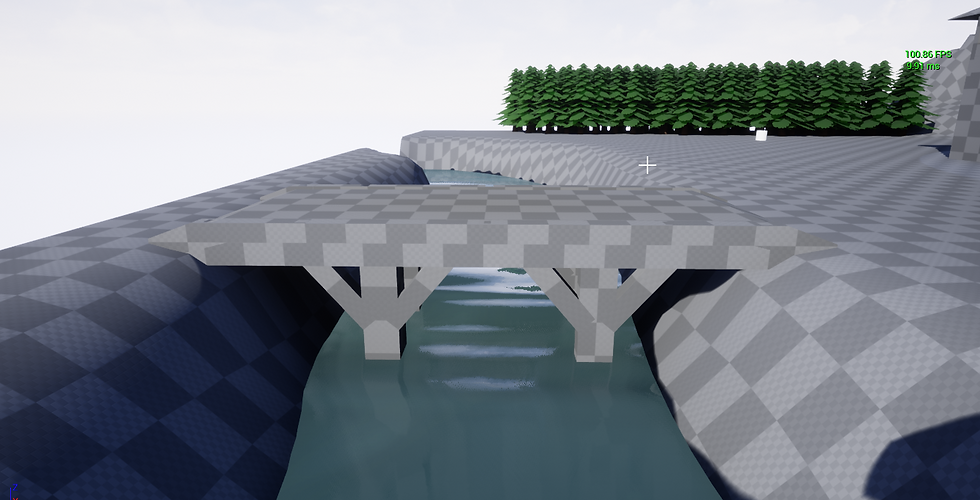
I have finished the bridge. I was able to make adjustments to the bridge because I felt like it wasn't wide enough so I tried different sizes. I found the best size for units but made it not big enough for heavy breaching units as this would be unrealistic for a wooden bridge to support the weight.
This now means all the base structures are all complete and I can focus on any improvements.
I am very happy with how my project is going and how everything is looking.
Next week I want to focus on the inside of the fort. I want to see what building designs would fit into it and see if I need to change the design on my design layout. I hope to at least start on adding buildings, however as long as I know what I need and where to put buildings I will be happy
__________________________________________________________________________________
Week 6 -
Similar to last week, this week I have been in Unreal working on the blockout. I have been starting to work on the main fort area.
Last week I finished all the landscape and dimensions. That meant that this week I have been able to focus on the main fort design.
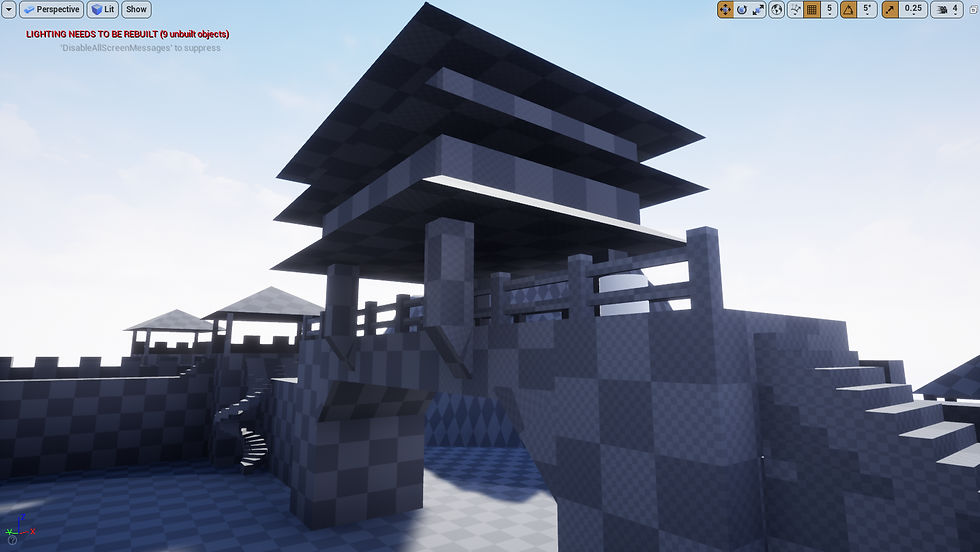
With the design of the fort walls I used some reference images from my mood boards. These had battlements on top which helped influence my design.
I also added towers onto the corners of the walls to add more of a defensive design. These were also on the images and also fit the in game fort designs.

I also looked at refence images of fort gates. The images I looked into had a wide but fairly short opening as the gateway so I used this in my design. I also have lots of references with buildings on top of the gateways. These added more aesthetic design but also allowed for troops to stay and added more defensive structure.
As you can see in these images they all have a main gateway with towers above. I am going to use this in my design.

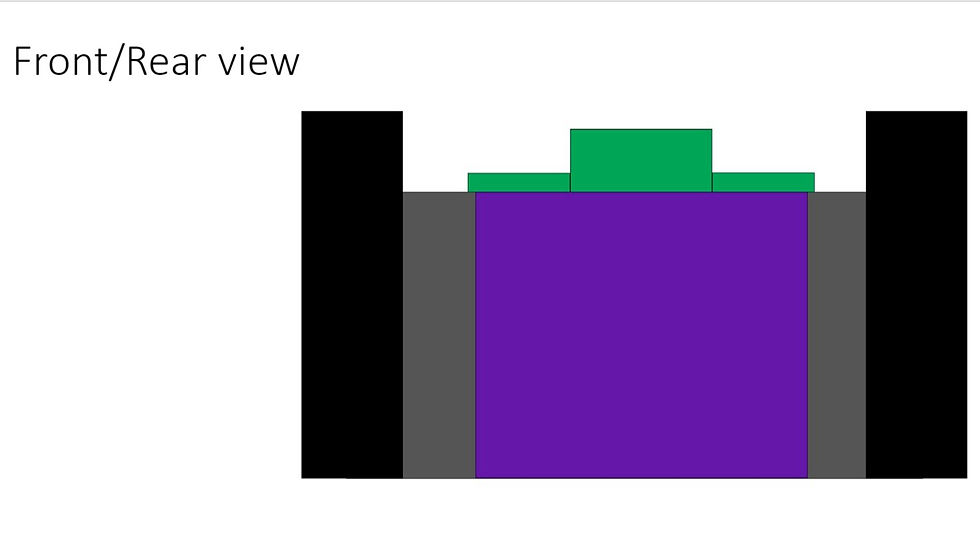
This is the design on the fort walls. I have added a multi layer building above the main gateway, with fences and ramparts, along with support towers onto each front corner.
I have not fully finished everything like the stairs etc, but next week I will finish these off. I will also maybe look into finishing off the design to the bridge. I have had a look into bridge designs but I am yet to add anything to the top of it as of yet. I have tried different bridge structures underneath and have made the base of the bridge based off images. So either this week or next week I will possibly look into finishing it.
This is the main reference image I have been using for the bridge. It is a traditional style Chinese bridge and has the same aesthetic as all the other aspects of the game itself as well as my level.
The bridge design I have so far is just the main base but I will possibly add to it next week once the fort walls are complete.
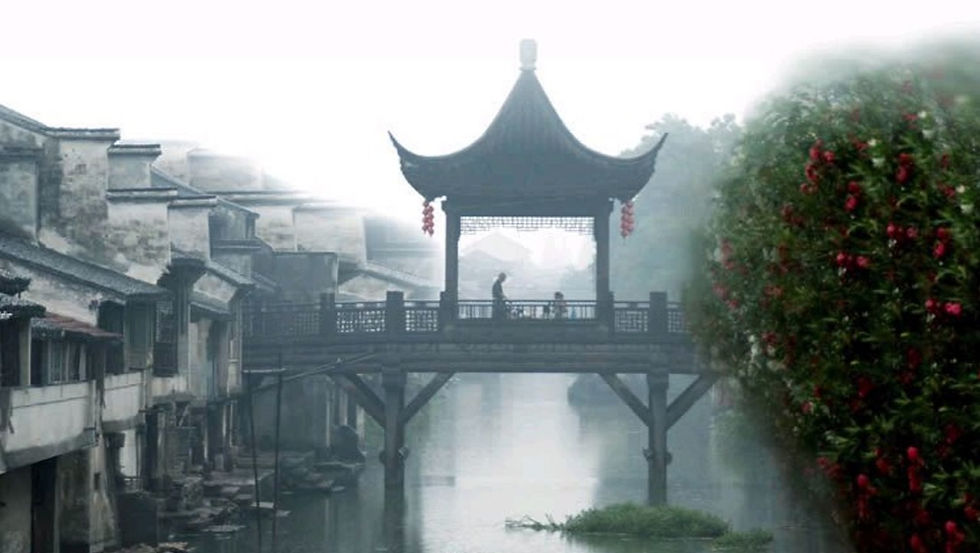
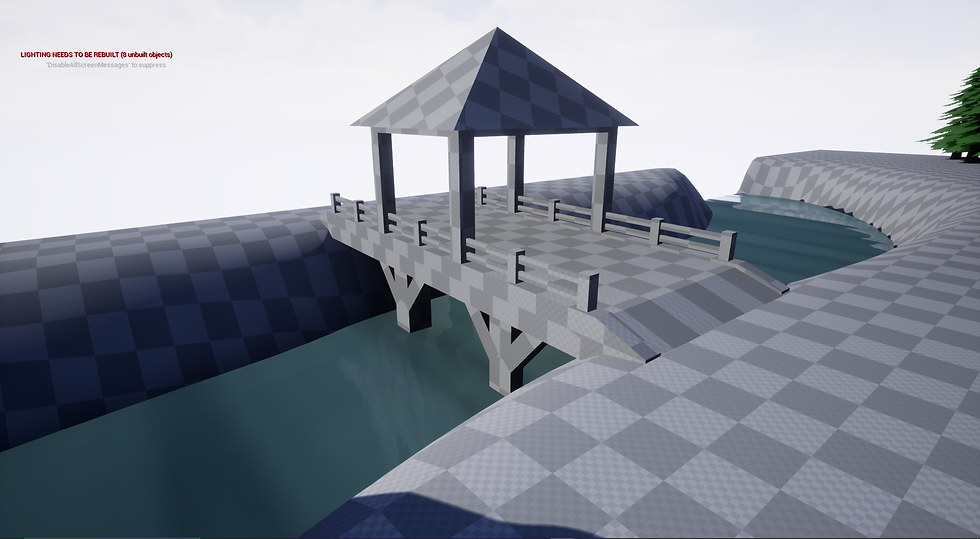
I have added fences to each side for aesthetics, but to also stop any troops in game from falling off the bridge into the water.
I have also added the structure in the centre. I have just used a simple shape to show this rather than creating a whole new model. I added a base to this shape to add a bit more thickness to the base of the roof.
__________________________________________________________________________________
Week 5 -
This week has been me starting to focus on actually creating my blockout in unreal.
So during the week I have been looking through my mood boards, and creating layout designs for both the buildings and the environment.
I made sure to keep with the design and style of the game as well as making sure it would work from a gameplay point of view.
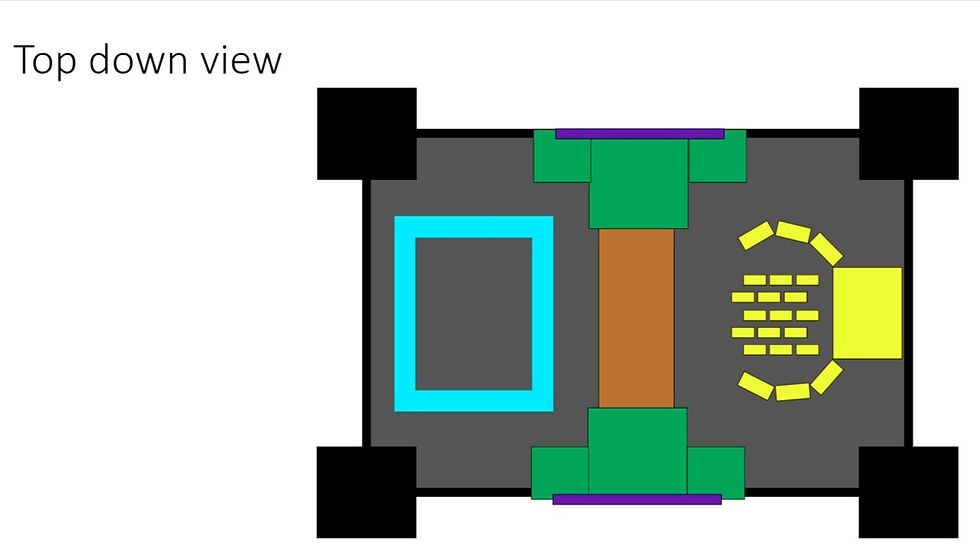
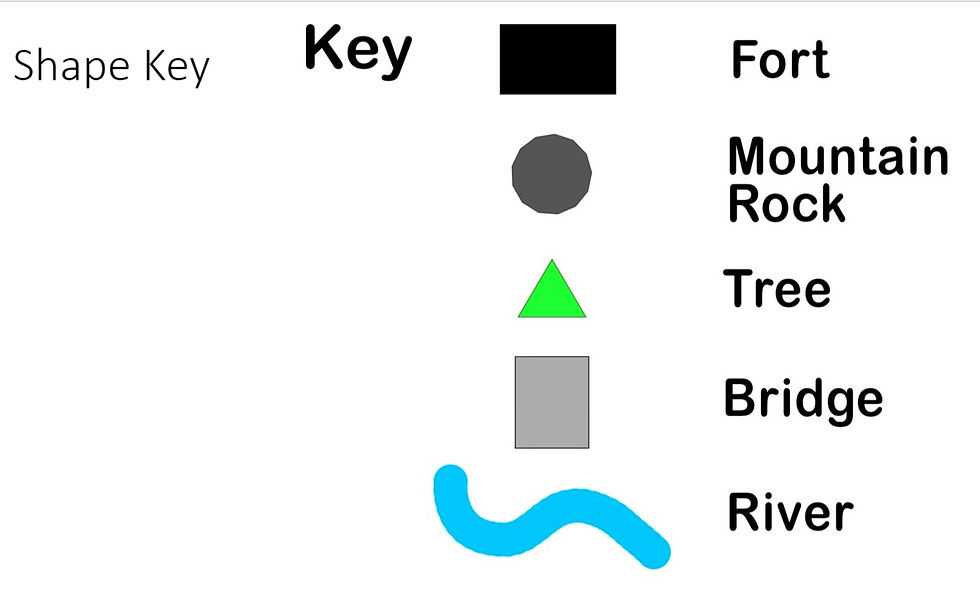
I made layout designs for the landscape and for the fort itself along with a key. These designs are not set in stone so the level may look a little different. They are also subject to change. However these do give me an idea on what and where to put different areas of the level.
Fort Design Layout


Environment Layout
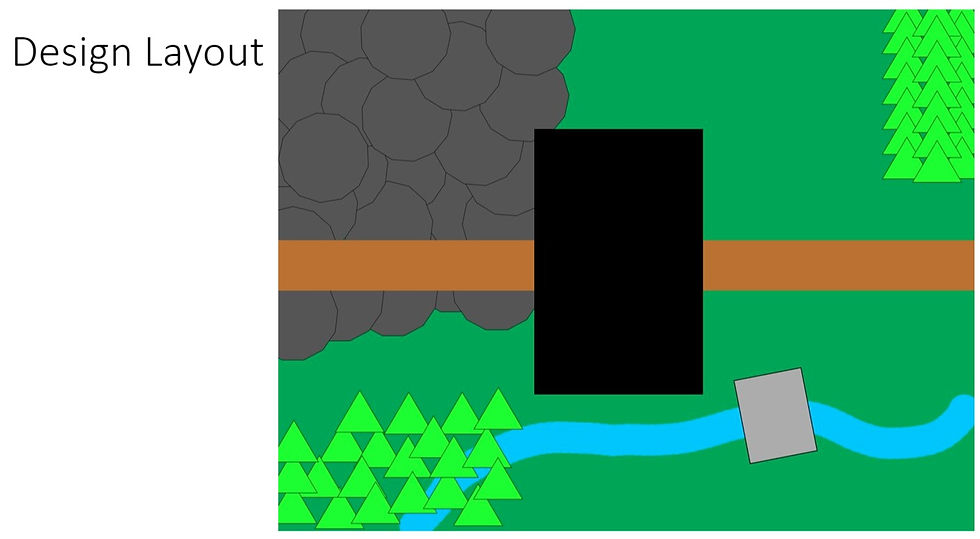
The environment layout I based off the idea of choke points. I made it so that there are two routes the player can choose to attack from each having advantages and disadvantages. The bridge allows for a faster, more direct route but increases the death rate of troops. The open area to the side is slower but allows for more strategy such as shield walls or archers etc.
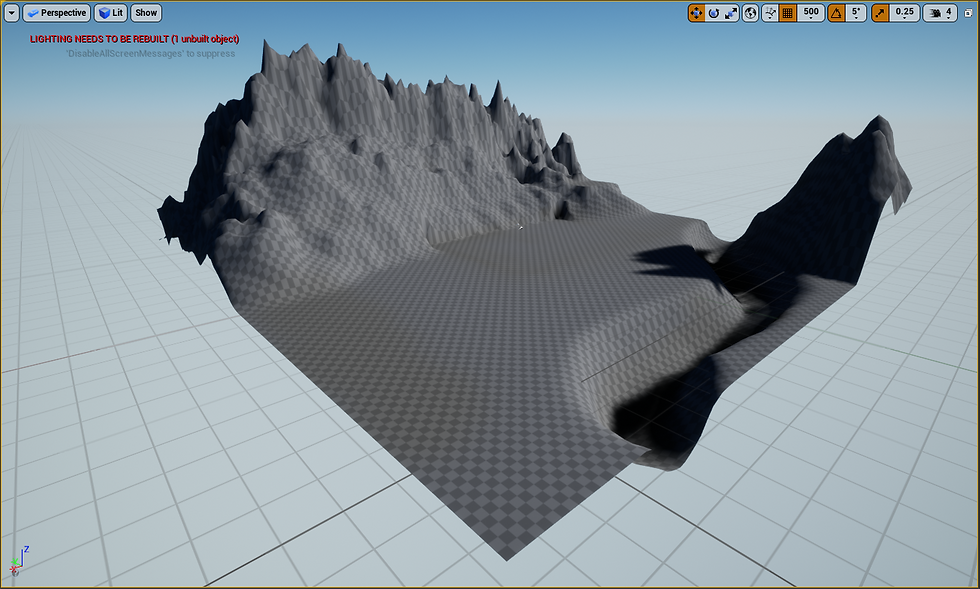
Later in the week, I started to actually create the designs in Unreal. I used the landscape tools to create the hills and river. At the moment it is just the landscape but I will add to it as time goes on.
I will be focusing on the dimensions and scale of buildings so that everything fits into the level.
So it is the end of the week and I have been working on adding the first bits to the level. I wanted to add the bridge first and then the main fort walls. I want to do these to see the scale and size of things I will need for other things in the level.
I did run into an issue where unreal crashed and I lost a little bit of work on the bridge because it crashed when I tried to save. However I managed to re-design it and it turned out better than before.
The changes I made to it were:
---- The supports under the bridge have a triangle design. It used to just be one singular beam. This change was because triangle designs are very common in actual infrastructure because of their strength, and all the reference images I have include this design.
---- There are small ramps on each end of the bridge so it looks cleaner and also looks more pleasing
---- There is a small lip on each side of the bridge. This gives it more depth and lets me add a fence/something similar with added height.
For next weeks lesson on Friday, I am going to have the basics of the landscape and fort all have the right wall dimensions etc.
Then during the lesson I may be able to add buildings inside of it. This will let me test what sizes to have buildings compared to the size of the units in game.
__________________________________________________________________________________
Week 4 -
This week I have been continuing making mood boards for the environments and building in the game and also based on real life.
I have filled roughly two slides worth of images for both and have a good idea on what I can make/what designs I can use.

As you can see on most of the buildings there is a repeating similar pattern with the building style. This is important for me when designing any buildings in my level. There are also similar walls in all the images as well as similar layout designs which I will have to take into account.

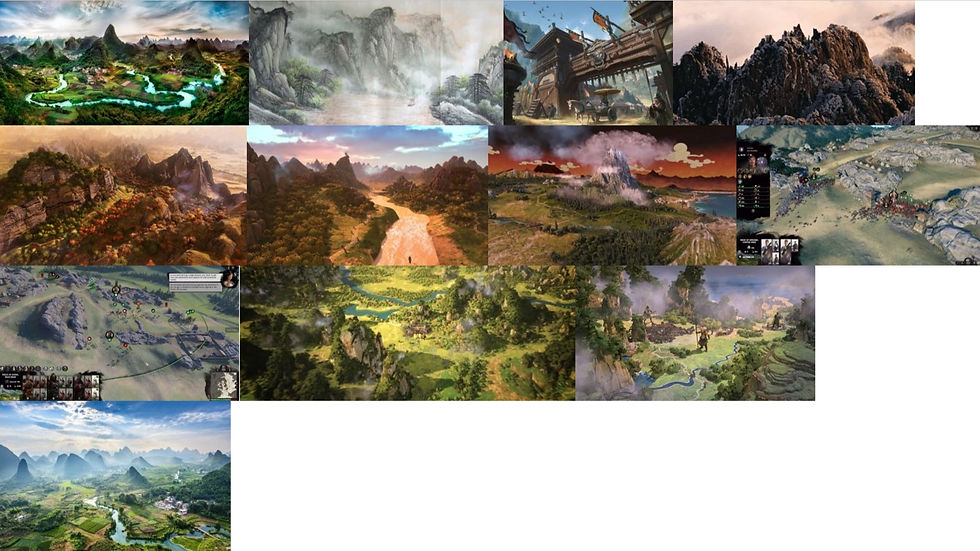
I am adding mountains to my level, and as you can see the mountains in the reference images are all very tall with no ability to climb them. I will have to keep this in mind when I am creating the landscape.
For our lecture this week, we had a virtual talk with the lead character designer from Creative Assembly talk to us about what roles he had, how the work was etc. He also answered any questions we had.
Some questions were generic and asked about what it was like working in industry and where did he come from etc. However some questions were unique, such as "how much did you have to communicate with other teams?". This was an interesting question because he gave an insight of how many people were on each time at different times and that, because he was a lead, he had to have constant daily communication with other teams as communication is key.
Another question asked, was about how much involvement with the project he had because he was a lead. This was interesting because I always thought the Lead was just an overseer, but after hearing that the lead also was involved with actual production it got me interested.
Next week I am going to start working in Unreal. I am going to start learning and Using the environment tools to build a landscape for assets to be placed into.
__________________________________________________________________________________
Week 3 -
This week we were shown what they look for in blog posts. They showed us some examples of some high level ones and also some different sites to use. This week is still a part of the research and development stage so I am not working on my project at the moment but next week I will have more to add like pictures.
This week I did make some mood boards for environments/buildings. These are ongoing and can be added to and changed throughout the project, But I wanted to start them now so I can have some ideas.
These are the mood boards -
https://liveteesac-my.sharepoint.com/:p:/g/personal/b1072608_live_tees_ac_uk/ESEcnPK8XPtJkP3Sc5abyEwBj5UIoozjQgDG1tZ0tlYJ9w?e=xbHTYF
I am very excited to actually start working on this project. I want to do well and improve/learn skills in unreal. I also want to improve my creativity.
Next week I will be starting to actually work on the project physically so I will have more to update with and may have some images to share.
__________________________________________________________________________________
Week 2 -
This second week has been more focused on us researching and learning about the game I will be working on.
Learning about the game and also the real life inspirations of it will really help when creating and also when talking about your ideas etc.
I also learned about things designers should have to be a good designer. Some of these things I already knew about like knowing about form/function, layout, flow/pacing, psychology. But some things I was surprised about like empathy. But after being explained why it became more clear. Empathy is needed so you can understand the player and any needs they need.
This week I also started doing some research into the game and the real life backstory behind it. I mainly watched you tube videos. Because I had never heard of the game I decided to watch some videos of gameplay from the game. While watching I learned about the genre of game it was, the art style etc. This really helped as it helped with deciding on what sort of level design I want to do.
This is the first video I watched. It shows gameplay of all the different parts of the game, these being the map, characters, armies, battle mechanics etc.
This really helped because even after this one video I already knew so much more and I already had some idea of what I wanted to do for my project.
This is a video of the three kingdoms backstory from real life. It goes over the history of it all.
This video helped with showing my why the game was made and what ideas etc. they used for the game. It also helped with learning different things from the history and it was actually fun to learn about it.
This research was actually really helpful in giving me an idea of what I wanted to do for my project. This was very good because this week I also got my first task set. We were tasked with making a proposal for our project, so the research I did really helped. From this I created my proposal in line with the word count and requirements.
This is the proposal

I handed in early so next week I won't get the marks or anything for it. But this idea is something I think will give me the most skills because it is blockout design which I want to do, as well as being something I am fairly confident with but still challenging (landscape design).
__________________________________________________________________________________
This is my first blog post for this project. I want to first say that I am very excited to actually be working on a project that is from industry. It will give me more of an insight into what industry standard work looks like and will also help teach me skills and build upon what I already know.
Week 1 -
So the first week of this project wasn't me actually starting work, it was more getting up to date with what was going on and getting comfortable.
I had a lecture about what the course was about and the gradings etc.
I learned that we were going to be working on a project set by an actual game company (Creative Assembly) and I got really excited. I'd never heard of the game we were tasked to work on either which was sort of scary but I figured it would be a fun challenge to learn and create on a game I'd never seen.
The actual project set, is to create a DLC pack for Total War: Three Kingdoms with one mechanics or level etc.
I will be creating a level design for this because that is what I am heavily interested in.
Comments